There are many exercises we do during keiko, for example kirigaeshi, kakarigeiko, uchikomi, etc. What I’d like to talk about today are the points I pay attention to when it comes to uchikomi. Naturally, as we get older our physical power declines. And the number one place of this decline is in our legs. So we must strengthen our legs. Even though it might be difficult to increase our leg strength, we should try and not allow our current leg strength to decline as much as we can. If we do this, we will natural see a difference when we practice with people of the same age.
So, now I want to talk about how to strengthen our legs during the practice of uchikomi. Without worrying whether it is “correct” or not, when it comes to strengthening our legs, I think we should use the full length of the dojo.
For example, when we striking men, we should travel using suriashi from one end of the dojo to the other quickly, smoothly, and sharply. By doing this, we can help strengthen our legs. Do this up and down three times. Naturally, I think, there is good benefit in practicing like this. I think doing this within uchikomi allows us to improve both our men strikes and our leg strength.
Even though it is relatively simple, the most difficult thing in kendo is ashi-sabaki. One thing that we do in kendo that we don’t do in our daily life is fumikomi-ashi. Stamping footwork. We pretty much never do this in our daily life.
Another example of something like this is the type of continuous footwork we do when striking, for example, kote-men. One way to check if your leg strength is declining is to practice kote-men strikes: “Ah, my legs have become weak.” “Oh, that person’s legs have become weak.” By looking at someone’s kote-men strikes we can generally tell the decline in someone’s leg strength. So, we should not only do the men strikes the full length of the dojo as mentioned before, but also kote-men strikes. “kote-men” techniques is often explained as “first strike kote and, if the opponent moves back, then strike their men.” This is of course the base of this technique, but, please put this aside for a moment and try practicing kote-men simply as a continuous strike (i.e., as a method of strengthening our legs).
Lastly, kirikaeshi. Kirikaeshi is something we cannot leave out of any discussion on kendo.
In kirikaeshi, the teaching DAI-KYO-KEI-SOKU is embedded. That is “large, strong, light, and nimble.”
To these four, I personally add another KAKU (“reliably”). That is, to strike the correct area reliably. When striking left and right men, you should aim to strike the opponent’s men, not their shinai.
These are the five points I make when teaching kirikaeshi. I’d like it if you would pay attention to these five points when practicing kirigaeshi.
Point: During uchikomi, suriashi from one end of the dojo to the other to help strengthen your legs. It is good to make your footwork small and fast. Use continuous kote-men striking as a leg-strength barometer. Do kote-men without breaking your posture. Kirikaeshi should be executed with large, strong, light, and nimble movements.
Although we did a lot of different things up until this point in the video, I believe the very base of my kendo to be the basic shomen strike. Why is this? Well, if you can strike a basic men from a far distance then you will be able, to some extent, easily strike kote, do, tsuki, and continuous techniques.
So please, everyone, first master striking basic men from issoku-itto-no-maai. Like this, without moving your left foot in first as described before. This is the base.
Kote is below you, so just strike down. Remember not to divert your gaze. Do is simply a diagonal cut. Tsuki is simply straight. Kote-men is just a combination of basic kote and men strikes one after another.
But first is the basic men strike from issoku-itto-no-maai.
Only once you have mastered this, you should proceed to the other techniques
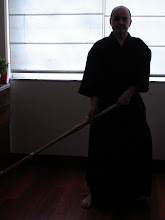
Toru KAMEI Sensei’s Kendo Lecture
The text of this note is an excerpt of DVD> Toru Kamei's Kendo Improvement Course () Book – 2017/6/1 Toru Kamei (Author) and Toru Kamei's Kendo Improvement Course () Book – 2017/6/1
Registration information
Release date: 2017/6/1
ISBN-10: 4884584074
ISBN-13: 978-4884584078
Publisher: Physical Education and Sports Publisher (2017/6/1)